This was going to be a girl’s ride, just my friend Sandy and I. Sandy just started riding this Spring, bought herself a Ducati Monster 750, took a long trip on it and decided she liked touring so much that she wanted a sport-touring bike, so in July she bought a 2003 Ducati ST4s for touring. I’ve been on a few rides with Sandy this summer and all I can say is she is a natural. It took me at least a couple of years of riding to get to the lever she is at now.
So our ride, which I named "2 Ducs, 10 days and 10 states" officially starts tonight since Sandy arrived at my house already. We have some work to do though. She overpacked her top case and dropped her bike right outside my house trying to make a u-turn. We'll have to see what she can leave behind to lighten up her load and re-pack her top case.
Tonight I still have to load the maps to my GPS, write down the route for the next 10 days and finish packing. Tomorrow morning we leave.
Thursday, August 31, 2006
Wednesday, August 30, 2006
My packing list for a 10 day tour
Gear/clothes
Clear & tinted helmet shield
Glove liners
Balaclava
Electric Widder vest
Cooling vest
Sunglasses
5 days worth of clothes
Sandals
Shorts
Long pants
Micro fleece shirt
Bathing suit
Bike stuff
Misc. tools in addition to the bike tool pouch (Ducati one is useless)
Fuses
Paper funnel
Chain lube
Tire plug kit
Gas siphon
Tire gauge
Duct tape
Electrical tape
Zip-ties
Mini air compressor
Bike lock
Kickstand plate
Multi tool (w/ beer opener)
Rag to clean bike/helmet shield
Tiny spray bottle with water (to clean bike and helmet shield)
Personal
Toiletries
Sunscreen
Lip balm
Tissues
Compact hair drier
Contact lenses/solution/drops
Moist towelettes
Headache medicine
Small towel
Camping
Pillow
Sleeping bag
Sleeping pad
Headlamp
Folding umbrella
Tent, cover and foot print
Food/water
Platypus
Granola bars
Trail mixRed Bull (few cans stashed for emergencies)
knife, spoon, fork
MISC
Ear plugs
Maps
GPS
Digital camera and charger, SD cards
Pen and paper
Voice recorder
Ipod and charger
Converter (to charge items on bike)
Travel alarm clock
First aid kit
Zip-lock plastic bags
Compression bag
Waterproof cinch sack
To dry stuff mesh bag
Spare key for motorcycle
Cell phone and charger
Insect repellent
Tuesday, August 29, 2006
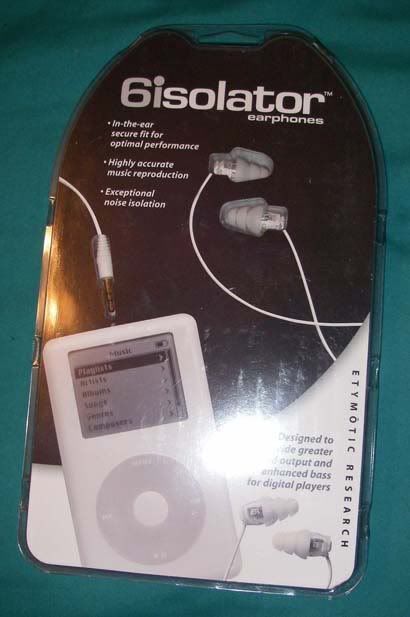
6isolator earphones
Monday, August 28, 2006
New GPS: Garmin Quest
My new GPS is here, so is the cradle for it and the RAM mounts.
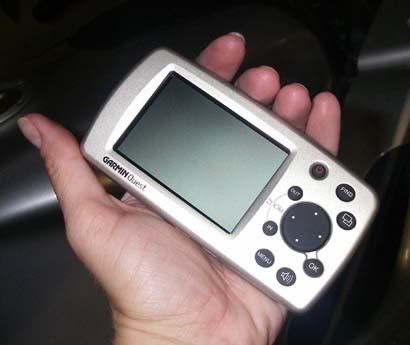
Garmin Quest
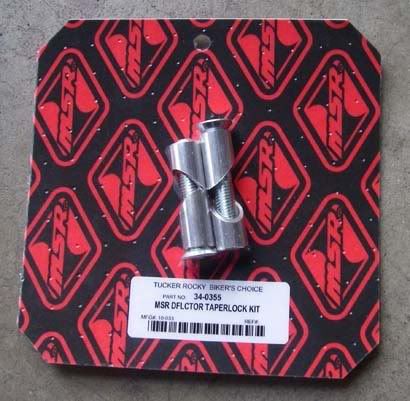
Tucker Rocky taper lock kit
Parts from cyclegadgets.com, great people to deal with by the way.

Above all the parts needed to mount the GPS to the ST3
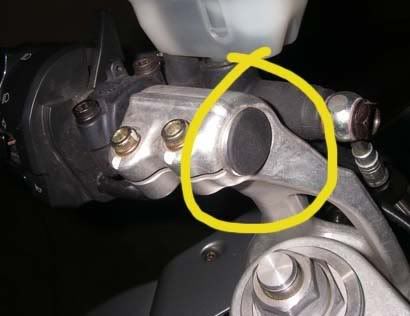
Remove rubber piece from handle bar
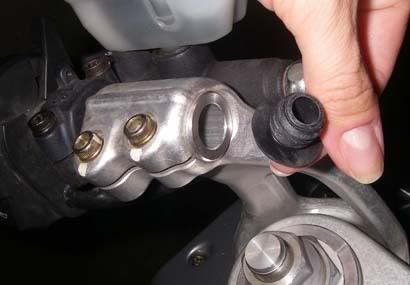
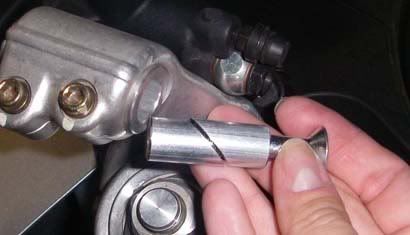
Install taper lock kit
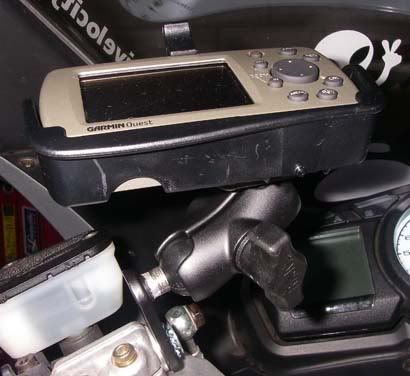
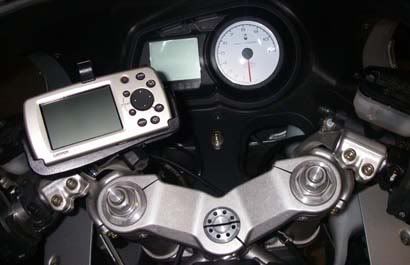
I will have a full review of this GPS after my trip, also I'll compare it to the Garmin V GPS that I used to use before. My Garmin V broke last year, that's why I had to buy a new unit.

Garmin Quest

Tucker Rocky taper lock kit
Parts from cyclegadgets.com, great people to deal with by the way.
RAM 11mm hole base
RAM short 1-3/4" arm
Garmin Quest cradle
Cradle mounting ball

Above all the parts needed to mount the GPS to the ST3

Remove rubber piece from handle bar


Install taper lock kit


I will have a full review of this GPS after my trip, also I'll compare it to the Garmin V GPS that I used to use before. My Garmin V broke last year, that's why I had to buy a new unit.
Sunday, August 27, 2006
Spidi Vaya pants
Today there was a ride to remember my friend Jerry that passed away exactly a year ago on his motorcycle. I was planning to go even though I had a million things to do still to get ready for my trip, but when it started to rain in the morning, I had decided to stay behind and continue packing. The 954RR had brand new tires and didn't want to take that bike in the rain, the ST3 was already loaded up with all the luggage ready for the trip and I didn't want to get the 900SS wet since I've been trying to keep that bike nice.
We miss you Jerry!
I also needed to test my new Spidi Vaya pants, finally at around 7PM I got out for a short ride to check out my new pants. The sun had finally come out at around 2PM but I was too busy with things and couldn't get out to test them until later on. Too many things to do and not enough time.
I took off toward the west and did an 80 miles loop arriving home 1.5 hours later. My pants are very comfortable although the armor keeps moving up, I’ll have to fix that. I don’t think it’s adjustable so I'll have some sawing to do. I'll do a full review of these pants after my trip.
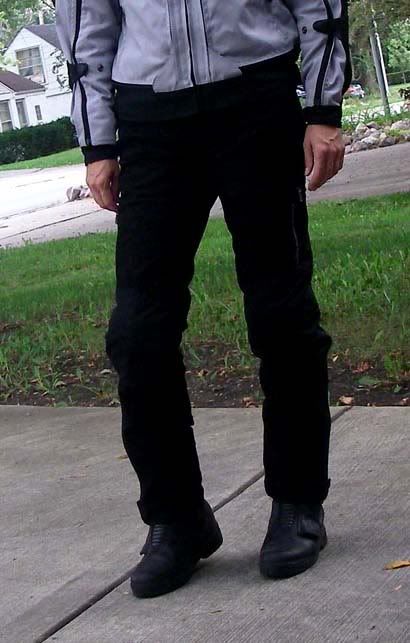
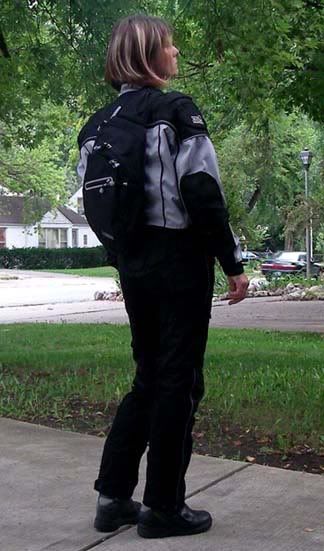
Spidi Vaya pants front and back
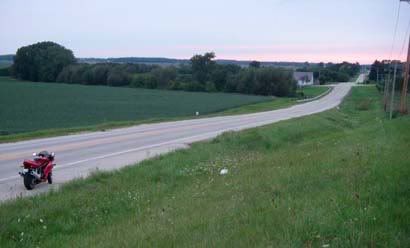
The 900SS at sundown
We miss you Jerry!
I also needed to test my new Spidi Vaya pants, finally at around 7PM I got out for a short ride to check out my new pants. The sun had finally come out at around 2PM but I was too busy with things and couldn't get out to test them until later on. Too many things to do and not enough time.
I took off toward the west and did an 80 miles loop arriving home 1.5 hours later. My pants are very comfortable although the armor keeps moving up, I’ll have to fix that. I don’t think it’s adjustable so I'll have some sawing to do. I'll do a full review of these pants after my trip.


Spidi Vaya pants front and back

The 900SS at sundown
Friday, August 25, 2006
Wheel install 954RR and packing ST3
Mounting Wheels on the 954RR
Peter swung by and we installed the wheels on the 954RR, that only took about an hour. The Honda is so much easier to work on compared to the Duc.
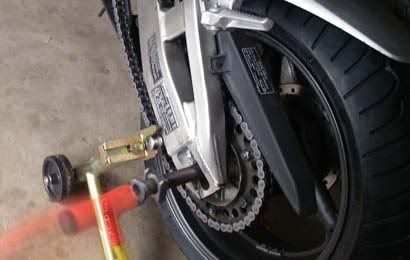
Getting the axel in on the 954RR
Packing the ST3 for the big trip
Today was supposed to be rainy (it actually never did rain). I intended to spend the whole day preparing the ST3 for the trip, packing, doing laundry and all that other fun stuff. I still needed to pick up a few things from REI and Wal-Mart for the trip also.
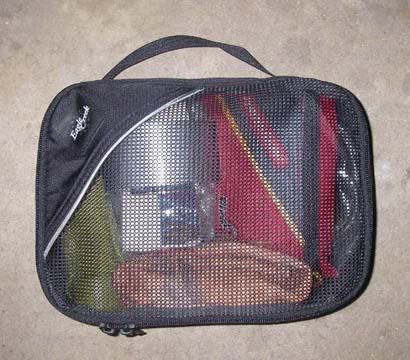
Eagle Creek Pack-It Half Cubes to keep stuff organized
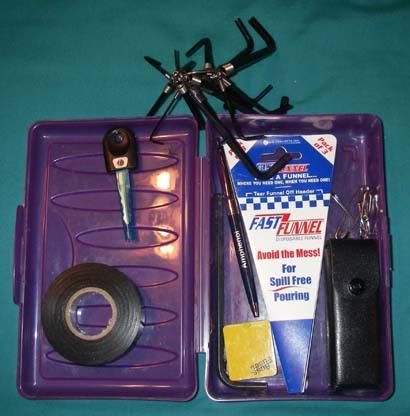
These plastic containers from Wal-Mart keep the smaller things organized
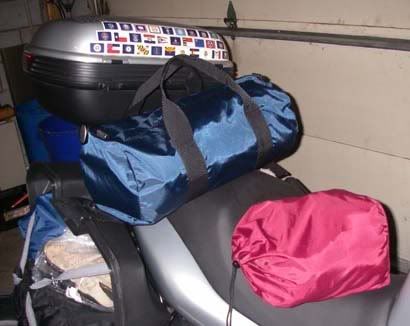
Blue Outdoor Products duffel bag for clothes, small Outdoor Pruducts draw string stuff bags for other misc. things
Peter swung by and we installed the wheels on the 954RR, that only took about an hour. The Honda is so much easier to work on compared to the Duc.

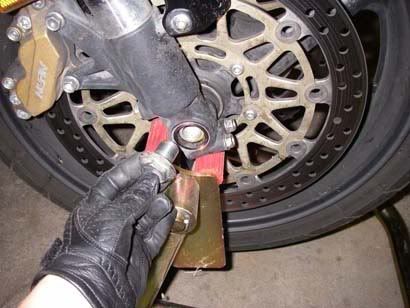
Getting the axel in on the 954RR
Packing the ST3 for the big trip
Today was supposed to be rainy (it actually never did rain). I intended to spend the whole day preparing the ST3 for the trip, packing, doing laundry and all that other fun stuff. I still needed to pick up a few things from REI and Wal-Mart for the trip also.

Eagle Creek Pack-It Half Cubes to keep stuff organized

These plastic containers from Wal-Mart keep the smaller things organized

Blue Outdoor Products duffel bag for clothes, small Outdoor Pruducts draw string stuff bags for other misc. things
Motorcycle camping gear test
In order to test my new camping gear, I decided to camp out in my own backyard for three nights.
Tent: Sierra Designs Light Year (3 season tent, 1 person tent)

Front side
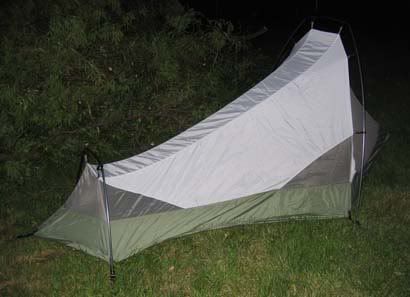
Back side
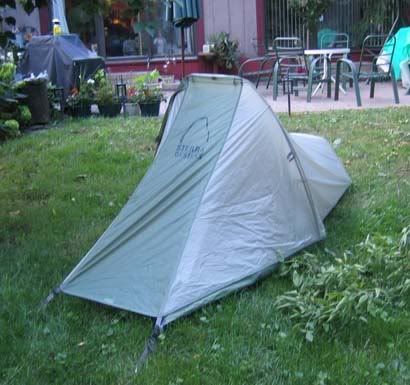
Rain cover

Very roomy inside
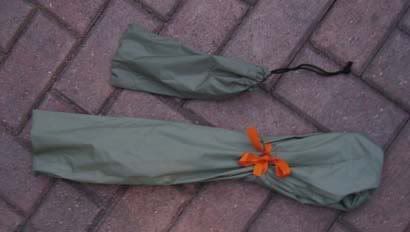
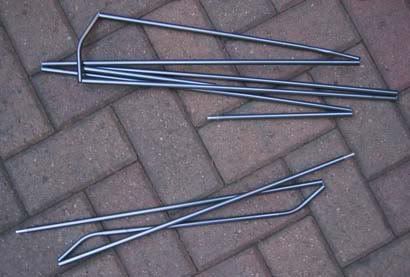
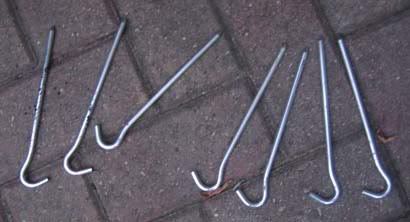
I actually didn’t find the directions for setting up the tent until after I had set the tent up, it only took a few minutes, very simple. Folded up, the tent is only 17” long and weights around 2 lbs 11 oz.
Sleeping pad: Big Agnes Insulated Air Core Rectangular Pad - Short 66in. x 20in.
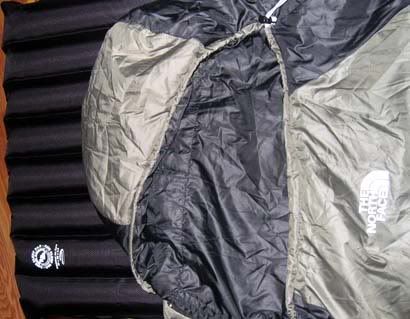
This one you have to blow up but it’s pretty thick, about 2.75”. The blowing up didn’t take that longer, longer than setting up the tent though Though. It took the same amount of time to empty the air out and to roll it back up. I chose this one over the self-inflating one because it was lighter and thicker, not sure yet if I made the right choice.
Sleeping bag: Northface mummy style synthetic 40 degree
Camping Test:
The One night was cool, one night was hot and humid and one night was rainy. On the last day while I was at work, 3 heavy storms moved thought he area with high winds, the tent was exactly where I had left it and it was still dry.
Over all I’m pretty happy with my camping gear. I was comfortable enough. I could have really gone expensive and gotten some really light and small folding stuff, but this wasn’t for some backpacking expedition, I can spare some room on the motorcycle for this stuff, I wanted decent quality and not too expensive. The tent, sleeping pad and sleeping bag cost me a total of approximately $230.
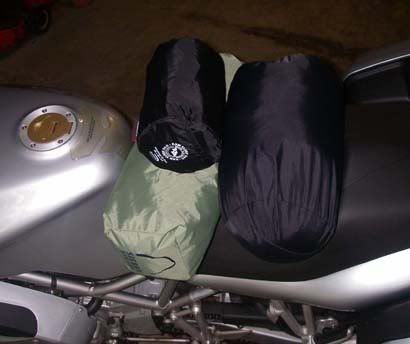
Tent, sleeping bag and sleeping pad ready for sport-touring
Tent: Sierra Designs Light Year (3 season tent, 1 person tent)

Front side

Back side

Rain cover

Very roomy inside


I actually didn’t find the directions for setting up the tent until after I had set the tent up, it only took a few minutes, very simple. Folded up, the tent is only 17” long and weights around 2 lbs 11 oz.
Sleeping pad: Big Agnes Insulated Air Core Rectangular Pad - Short 66in. x 20in.

This one you have to blow up but it’s pretty thick, about 2.75”. The blowing up didn’t take that longer, longer than setting up the tent though Though. It took the same amount of time to empty the air out and to roll it back up. I chose this one over the self-inflating one because it was lighter and thicker, not sure yet if I made the right choice.
Sleeping bag: Northface mummy style synthetic 40 degree
Camping Test:
The One night was cool, one night was hot and humid and one night was rainy. On the last day while I was at work, 3 heavy storms moved thought he area with high winds, the tent was exactly where I had left it and it was still dry.
Over all I’m pretty happy with my camping gear. I was comfortable enough. I could have really gone expensive and gotten some really light and small folding stuff, but this wasn’t for some backpacking expedition, I can spare some room on the motorcycle for this stuff, I wanted decent quality and not too expensive. The tent, sleeping pad and sleeping bag cost me a total of approximately $230.

Tent, sleeping bag and sleeping pad ready for sport-touring
Thursday, August 24, 2006
Mounting wheels: ST3
At lunch I located a 28mm socket for the front axel nut of the ST3, but no one had a 30mm in stock, I ordered one but it would be weeks until it arrived.
After work I picked up my wheels sporting new rubber and hurried home, a few minutes later my Friend Rick showed up to help me put the wheels back on the bikes. We started with the ST3, since I needed this bike to be ready for my trip next week. The front tire was easy, I got to use my torque wrench and my new 28mm 6pt ½” drive socket to torque the front axel.
The back wheel was the biggest pain in the butt to put back on, there is no way I could have done this alone, not on this bike. It’s such a tight squeeze between the fender, the Handy stand and the exhaust canisters.
It took forever to align everything just right to feed the axel bolt though the wheel, but we finally did it. It was too late to late to start on the 954RR, Rick had to head home. I did an oil change on the ST3 and called it a night.
The ST3 was ready for the big trip and that’s all that mattered.
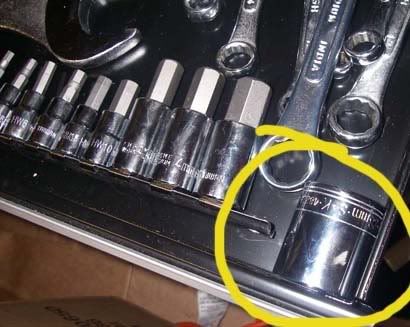
28mm 6pt ½” drive socket

The top from a chocolate covered raisins container was the right size to keep the wheel in place to feed the axel though.
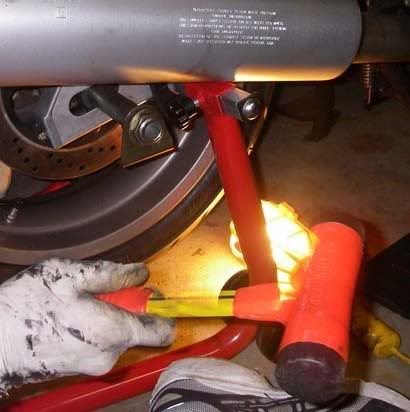
Getting the axel back in
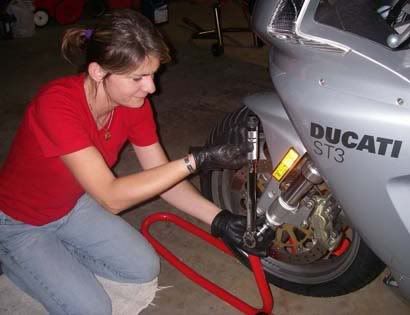
Using the torque wrench to tighten the front wheel

Torque wrench and the 28mm socket
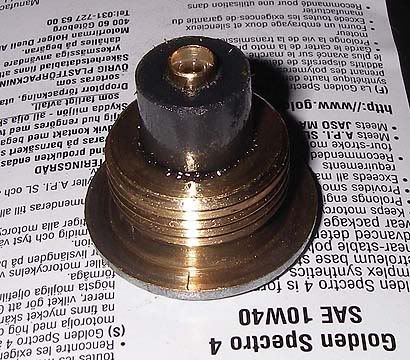
Less metal flakes in oil change #4
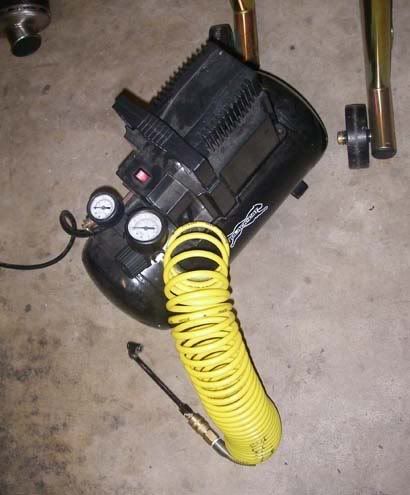
My friend Bernie gave me his old air compressor when he bought a new one, I got to use it for the first time
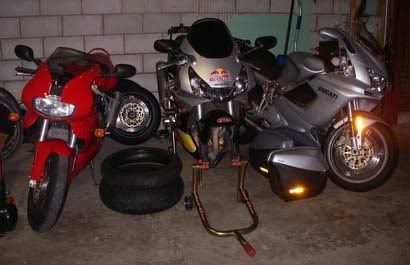
ST3 is ready to ride
After work I picked up my wheels sporting new rubber and hurried home, a few minutes later my Friend Rick showed up to help me put the wheels back on the bikes. We started with the ST3, since I needed this bike to be ready for my trip next week. The front tire was easy, I got to use my torque wrench and my new 28mm 6pt ½” drive socket to torque the front axel.
The back wheel was the biggest pain in the butt to put back on, there is no way I could have done this alone, not on this bike. It’s such a tight squeeze between the fender, the Handy stand and the exhaust canisters.
It took forever to align everything just right to feed the axel bolt though the wheel, but we finally did it. It was too late to late to start on the 954RR, Rick had to head home. I did an oil change on the ST3 and called it a night.
The ST3 was ready for the big trip and that’s all that mattered.

28mm 6pt ½” drive socket

The top from a chocolate covered raisins container was the right size to keep the wheel in place to feed the axel though.

Getting the axel back in

Using the torque wrench to tighten the front wheel

Torque wrench and the 28mm socket

Less metal flakes in oil change #4

My friend Bernie gave me his old air compressor when he bought a new one, I got to use it for the first time

ST3 is ready to ride
Wednesday, August 23, 2006
Tuesday, August 22, 2006
Getting new tires mounted
After work I loaded up my hatch back with 4 new tires and 4 wheels and I took of to Jim’s house in Bartlett. Jim mounts/balances tires for $20 per rim. He was going to have them ready for me tomorrow, but I wanted to pick then up on Thursday.
If anyone out there in the NW Suburbs needs to get some tires mounted and balanced, Jim’s the guy to do it, fast and cheap, and he wants your business.
You can contact Jim via e-mail at j.bayert@comcast.net
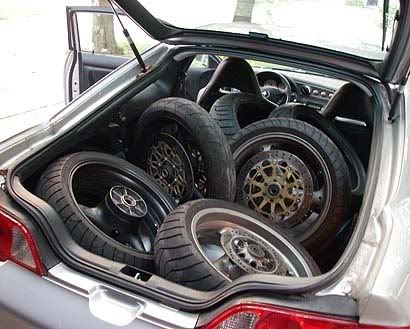
My car loaded up with 4 wheels and 4 new tires
If anyone out there in the NW Suburbs needs to get some tires mounted and balanced, Jim’s the guy to do it, fast and cheap, and he wants your business.
You can contact Jim via e-mail at j.bayert@comcast.net

My car loaded up with 4 wheels and 4 new tires
Monday, August 21, 2006
Removing wheels: ST3 & 954RR
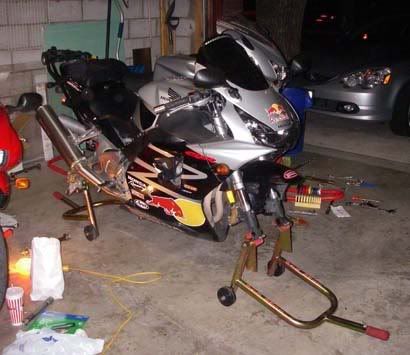
After work my friend Peter came over to help me take the wheels off the ST3 and 954RR.This is the first time that I’ve removed the wheels off my bikes. The 954RR was straight forward, the Pit Bull stands lifted the bike up nice and height, and I had the right size sockets and wrenches to remove the axel nut and loosen up all the other nuts and bolts.
The ST3 was a different story, it was hard removing the rear wheel. The handy stand doesn’t lift the bike height enough, and the fender and the exhaust cans are also in the way. I had a 30mm combination wrench to remove the rear axel nut, I didn’t not have a 28mm socket or wrench to remove the front axel nut so we had to use a crescent wrench.
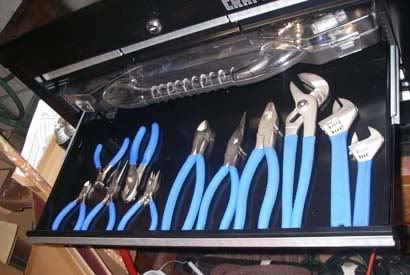
Let’s back up a bit though, I didn’t have a crescent wrench. Half way though the project Peter and I had to drive to Sears to pick one up. I’ve bought a bunch of tools over winter, the stuff that I thought I'd need, but I still didn’t have everything. So I picked up a few things I needed, crescent wrenches, a rubber mallet, and a few kinds of pliers. The rubber mallet came in really handy.
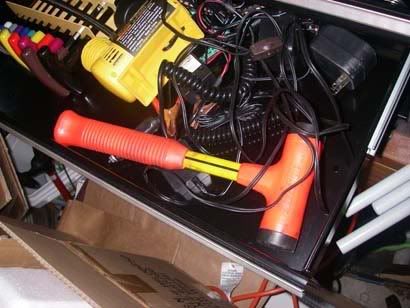
New rubber mallet
New crescent wrenches and pliers
The tire removal procedure goes something like this:
Lift the bikes on the stands
Rear Tire Removal
1. Loosen the rear axle nut
2. Remove the bolts holding the rear brake caliper (some bikes it’s not necessary to remove the rear brake caliper)
3. Remove the axle
4. Loosen the chain adjusters, push the wheel forward , drop the chain
5. Remove the rear wheel
Front Tire Removal
1. Loosen and remove the axle bolt
2. Loosen the pinch bolts on the forks
3. Remove the brake caliper bolts/brake calipers
4. Remove the axle
5. Remove front wheel
After a few hours later both bikes were done. Thanks Peter!
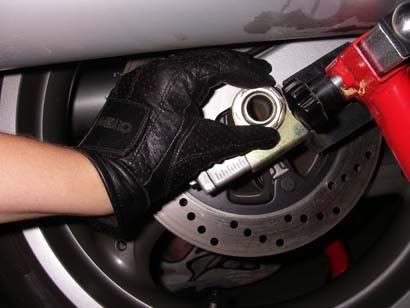
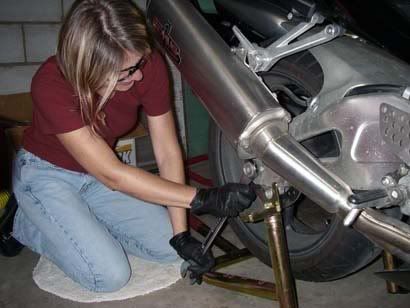
Removing the real axel nut on the ST3
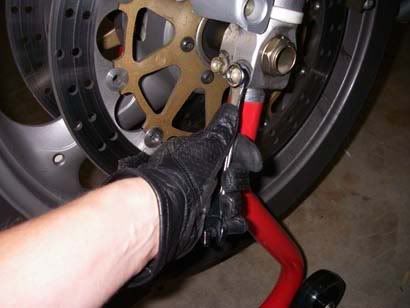
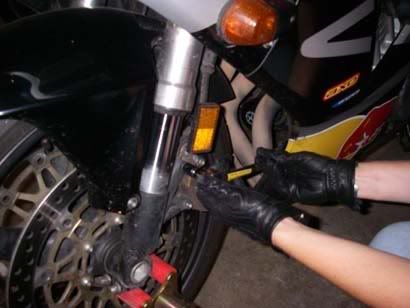
Loosening the pinch bolts on the forks on the ST3

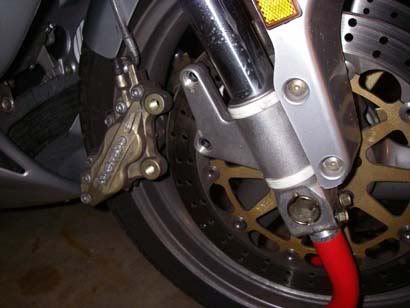
Removing the brake calipers on the ST3
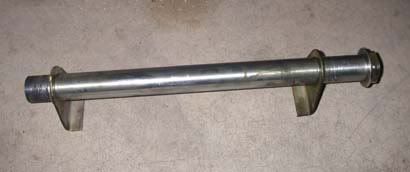
ST3 axel
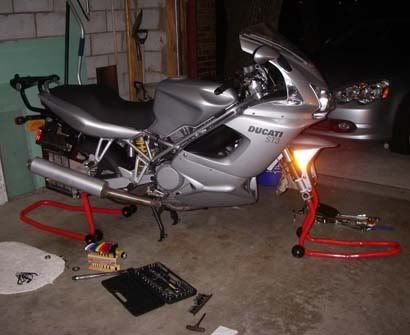
ST3 is done
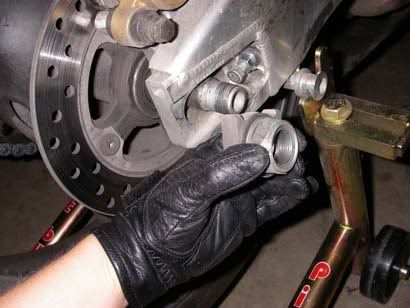
Removing axel nut on the 954RR
The ST3 was a different story, it was hard removing the rear wheel. The handy stand doesn’t lift the bike height enough, and the fender and the exhaust cans are also in the way. I had a 30mm combination wrench to remove the rear axel nut, I didn’t not have a 28mm socket or wrench to remove the front axel nut so we had to use a crescent wrench.
Let’s back up a bit though, I didn’t have a crescent wrench. Half way though the project Peter and I had to drive to Sears to pick one up. I’ve bought a bunch of tools over winter, the stuff that I thought I'd need, but I still didn’t have everything. So I picked up a few things I needed, crescent wrenches, a rubber mallet, and a few kinds of pliers. The rubber mallet came in really handy.

New rubber mallet

New crescent wrenches and pliers
The tire removal procedure goes something like this:
Lift the bikes on the stands
Rear Tire Removal
1. Loosen the rear axle nut
2. Remove the bolts holding the rear brake caliper (some bikes it’s not necessary to remove the rear brake caliper)
3. Remove the axle
4. Loosen the chain adjusters, push the wheel forward , drop the chain
5. Remove the rear wheel
Front Tire Removal
1. Loosen and remove the axle bolt
2. Loosen the pinch bolts on the forks
3. Remove the brake caliper bolts/brake calipers
4. Remove the axle
5. Remove front wheel
After a few hours later both bikes were done. Thanks Peter!

Removing the real axel nut on the ST3

Loosening the pinch bolts on the forks on the ST3


Removing the brake calipers on the ST3

ST3 axel

ST3 is done


Removing axel nut on the 954RR
Loosening the pinch bolts on the forks on the 954RR
Removing the brake calipers on the 954RR
Removing the front axel bolt on the 954RR
954RR is done
Subscribe to:
Comments (Atom)

